Pipeline
The pipeline module allows you to publish created apps as a standalone application. These applications are containerized and fully managed by Kubernetes, accessible by the end user via a specified domain and act as the production stage of an analytics pipelines. Entering the pipeline module displays all publishable apps. Selecting an app in this list allows you to to click the publish button, which brings you in the publish page of the app.
IMPORTANT: Before you can publish an app, you need to execute the story, that the app is based upon, once, via the Apply button in the story page.
Publishing an App
After selecting a pipeline and clicking on Publish in the Pipeline module

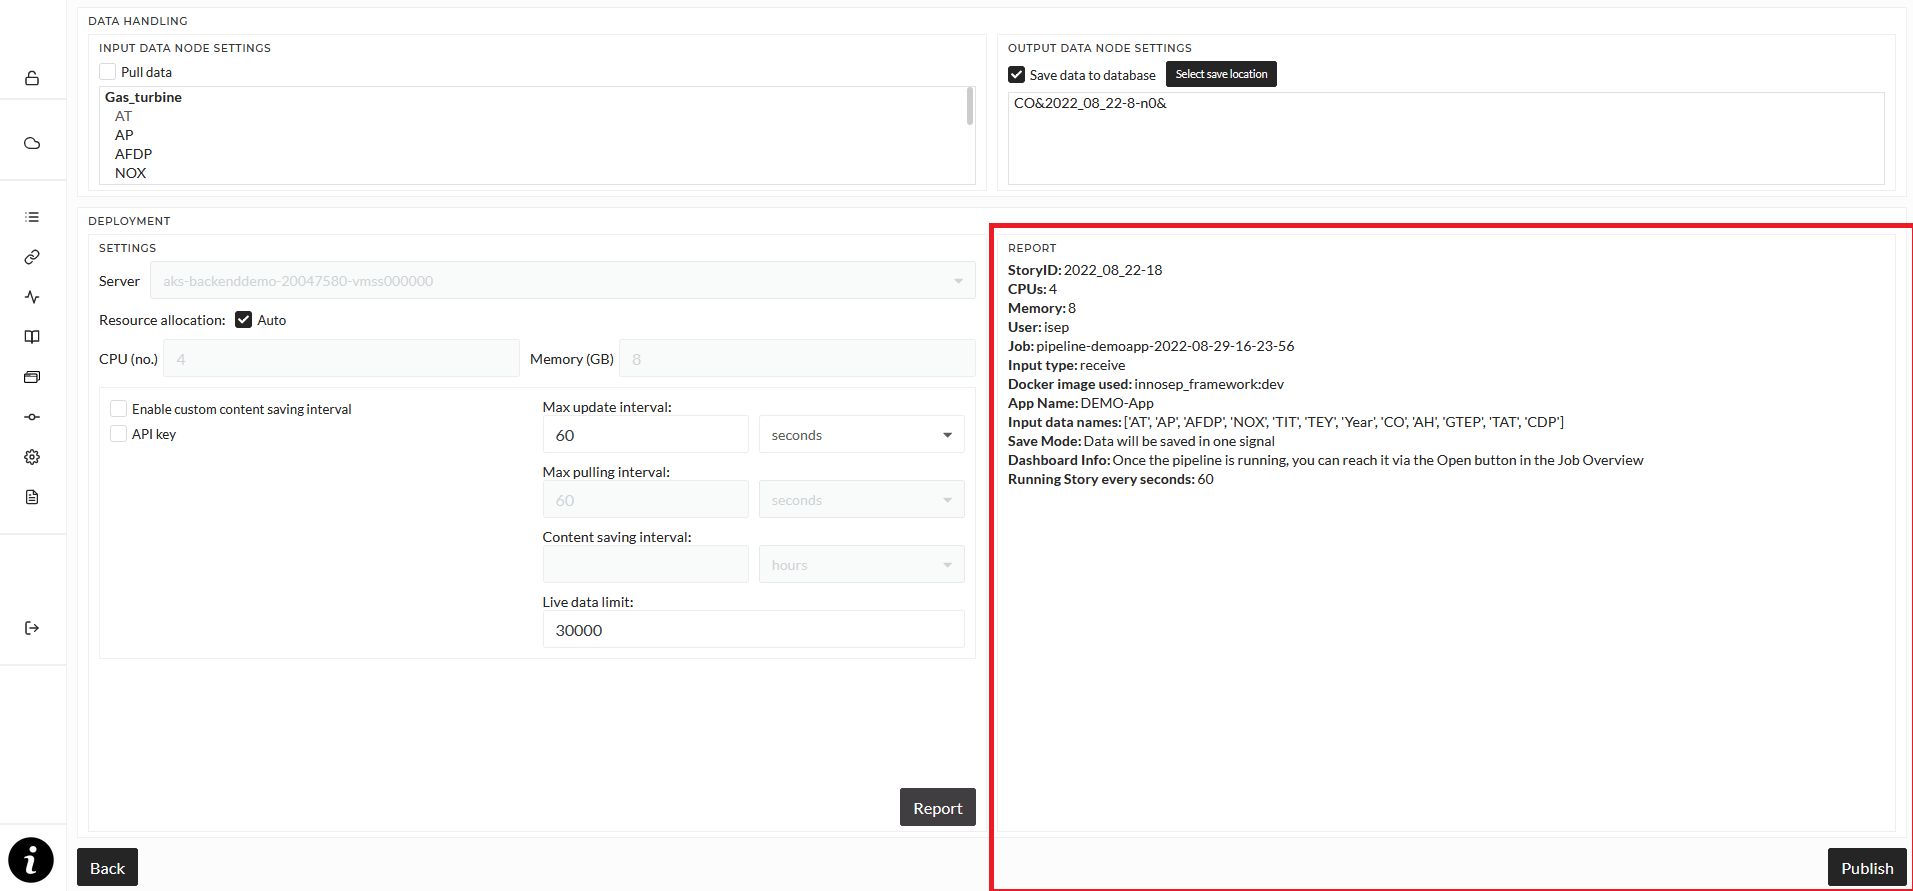
you can configure multiple publishing settings.
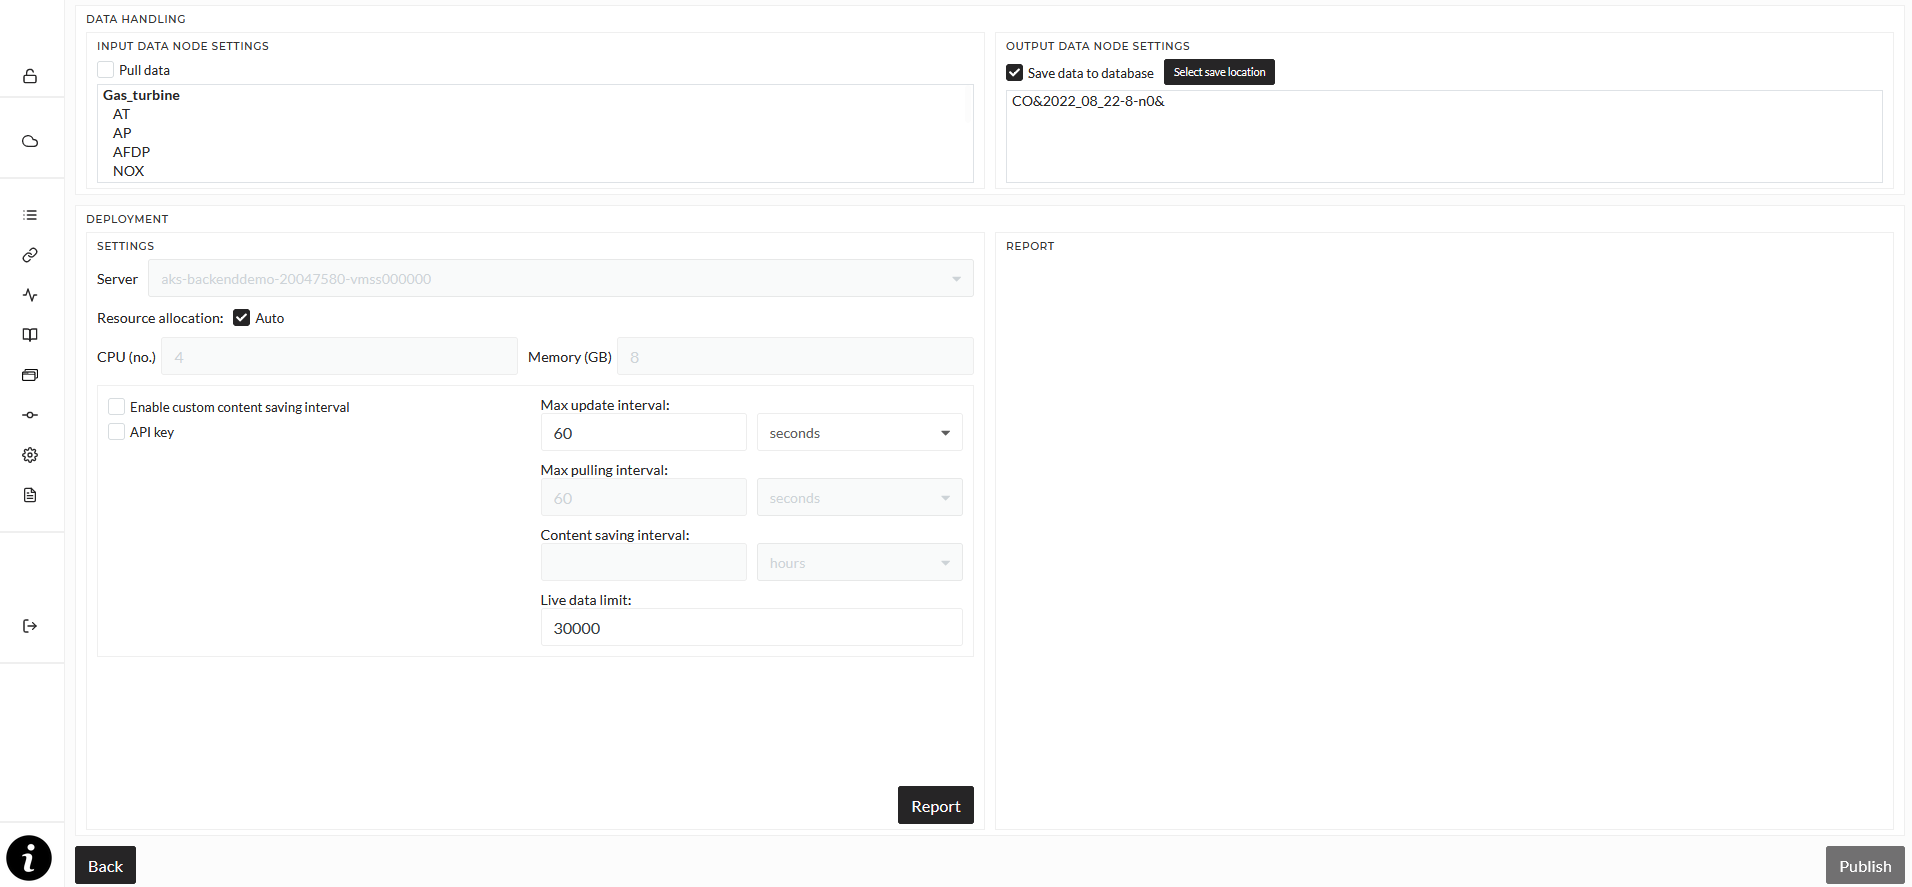
In the top left, you see all input singals for this pipeline, based on the selected story. Here you can swap signals, and therefor input data, just like when executing stories. Simply double-click a signal or the folder (written in bold letters) in the list.
The Pull data checkbox determines whether or not data will be automatically loaded from the data source or if the pipeline is started in REST mode. Pulling data can mean, load data from the standard MongoDB database, where you upload files or loading data from a Connection. This allows you to build a Story using only historical data, imported from files to the MongoDB, and then change the input data here for the pipeline to automatically load live data from a Connection, for example, a MQTT Broker.
In REST mode, the default mode, the pipeline waits for data to be sent to it via an POST request. See the REST mode section for details and examples.
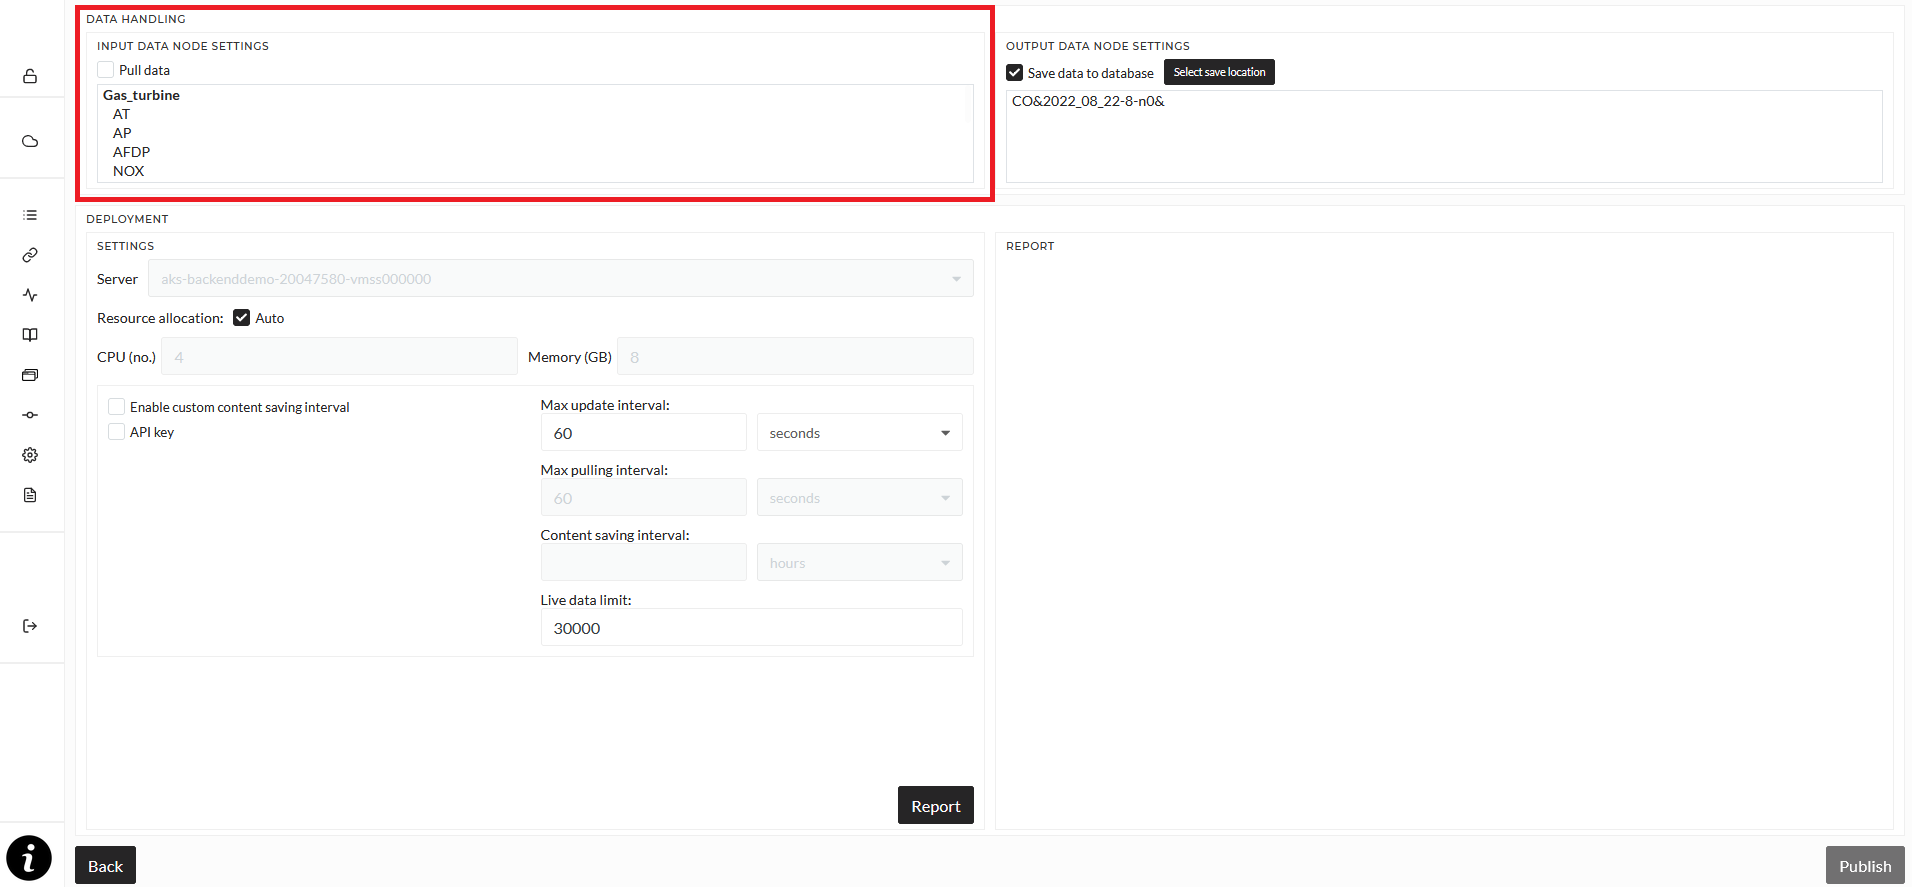
The top right displays all output signals.
By default, the result data of the pipeline will not be saved to the database. You can select to save the data permanently instead by enabling the Save data to database checkbox. This will save data temporarily, like when you start an operation using the Preview button in the Explore mode. This data is not selectable in the data explorer, only via the Job overview (select a Job and click Load Results). You can save data permanently to the data explorer by selecting a location for it using the Save Location button. In the opening dialog, you have to select a Content folder of any location. A folder will be created in the Content folder automatically based on the name of the pipeline. If this is set, you can load the data of pipelines from the data explorer and via the job overview.
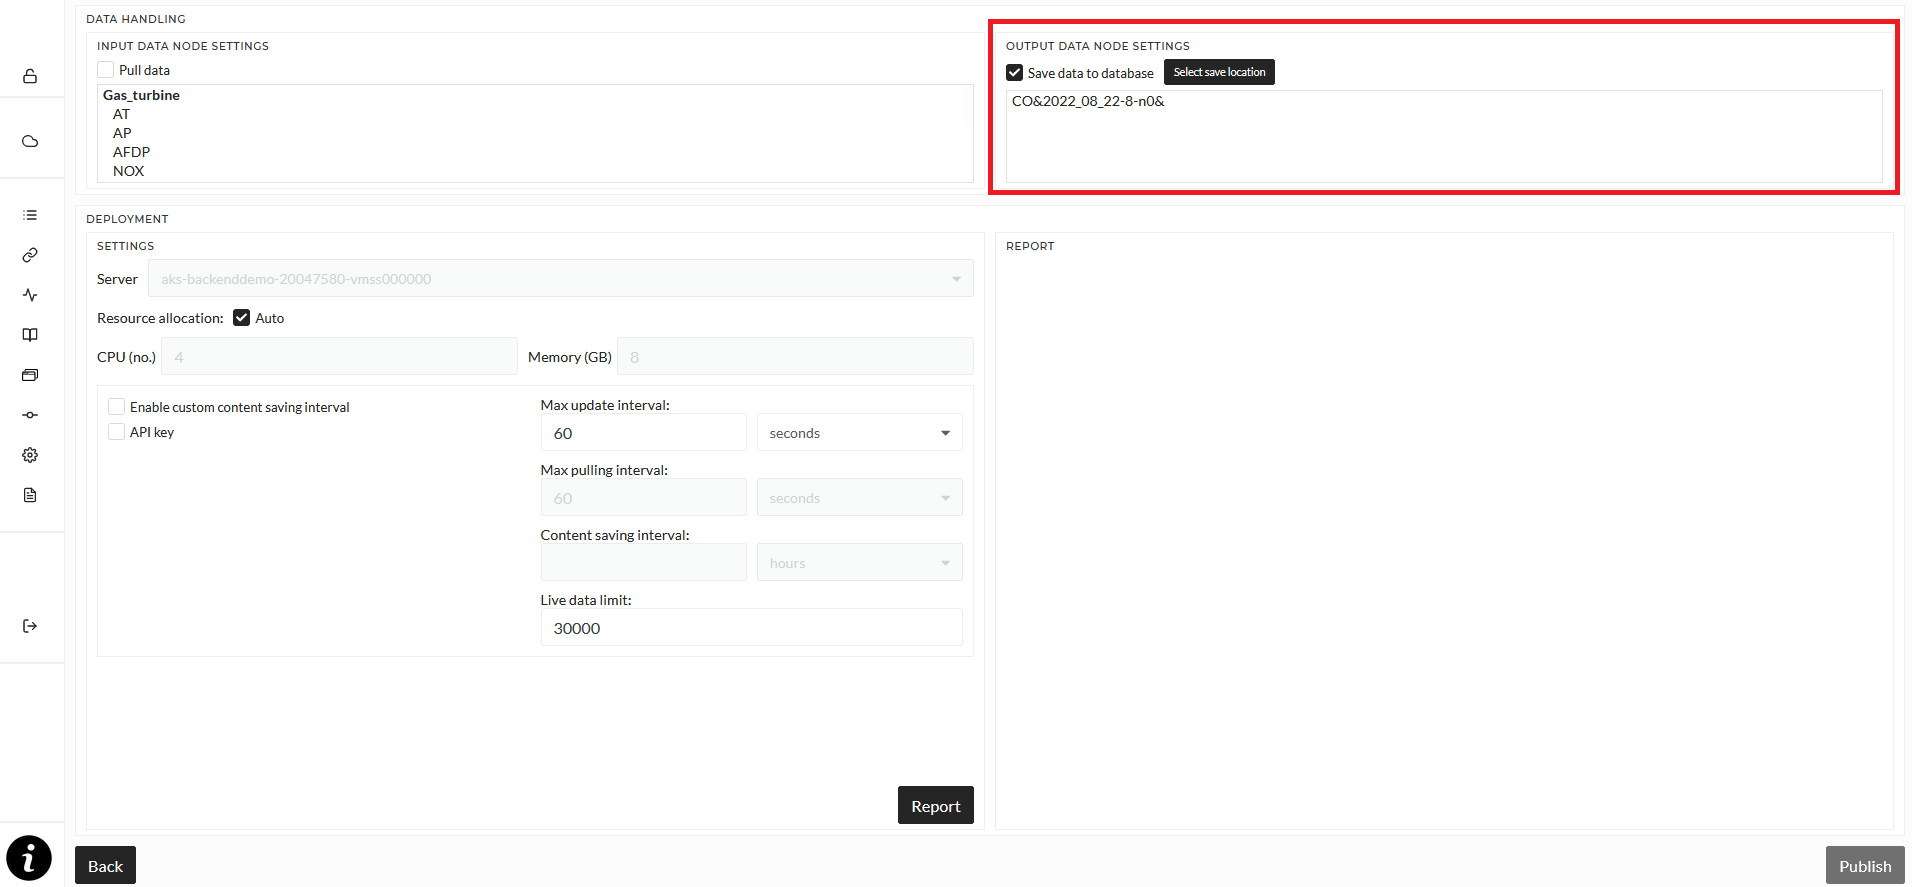
The deployment section contains important technical settings regarding deployment and running of the pipeline.
First, you have to select the node the pipeline will run on and the resources it should use. Default this will be set to auto and automatically set resources and the server. If you want to change resources and the server, unselect auto and select a server from the dropdown list. Once a server is selected, all availalbe resources will be shown in the resources fields. Edit them to fit your need. It is not recommended to select all available resources, a good start would be 4 CPU cores and 8GB of RAM, but this heavily depends on what is done in the pipeline and how much data is handled.
The checkbox for API key determines if a unique key will be generated for the pipeline that is required for sending and retrieving data.
The Enable custom content saving interval checkbox allows you to set an interval in which new signals will be created. Let's say that you select 6 hours. This means that every 6 hours a new signal will be created for newly processed data. The default setting is that no new signal will be created, which means that every piece of data will be saved in the same signal which can mean that this one signal grows very large over time.
Max update interval determines how often the story inside the pipeline is run, so how often the operation is executed. The default is every 60 seconds. Depending on the complexity of your story, a very short update interval may lead to performance issues.
Max pulling interval determines the interval in which data is pulled (loaded from the database), if "Pull data" is activated. The default is every 60 seconds.
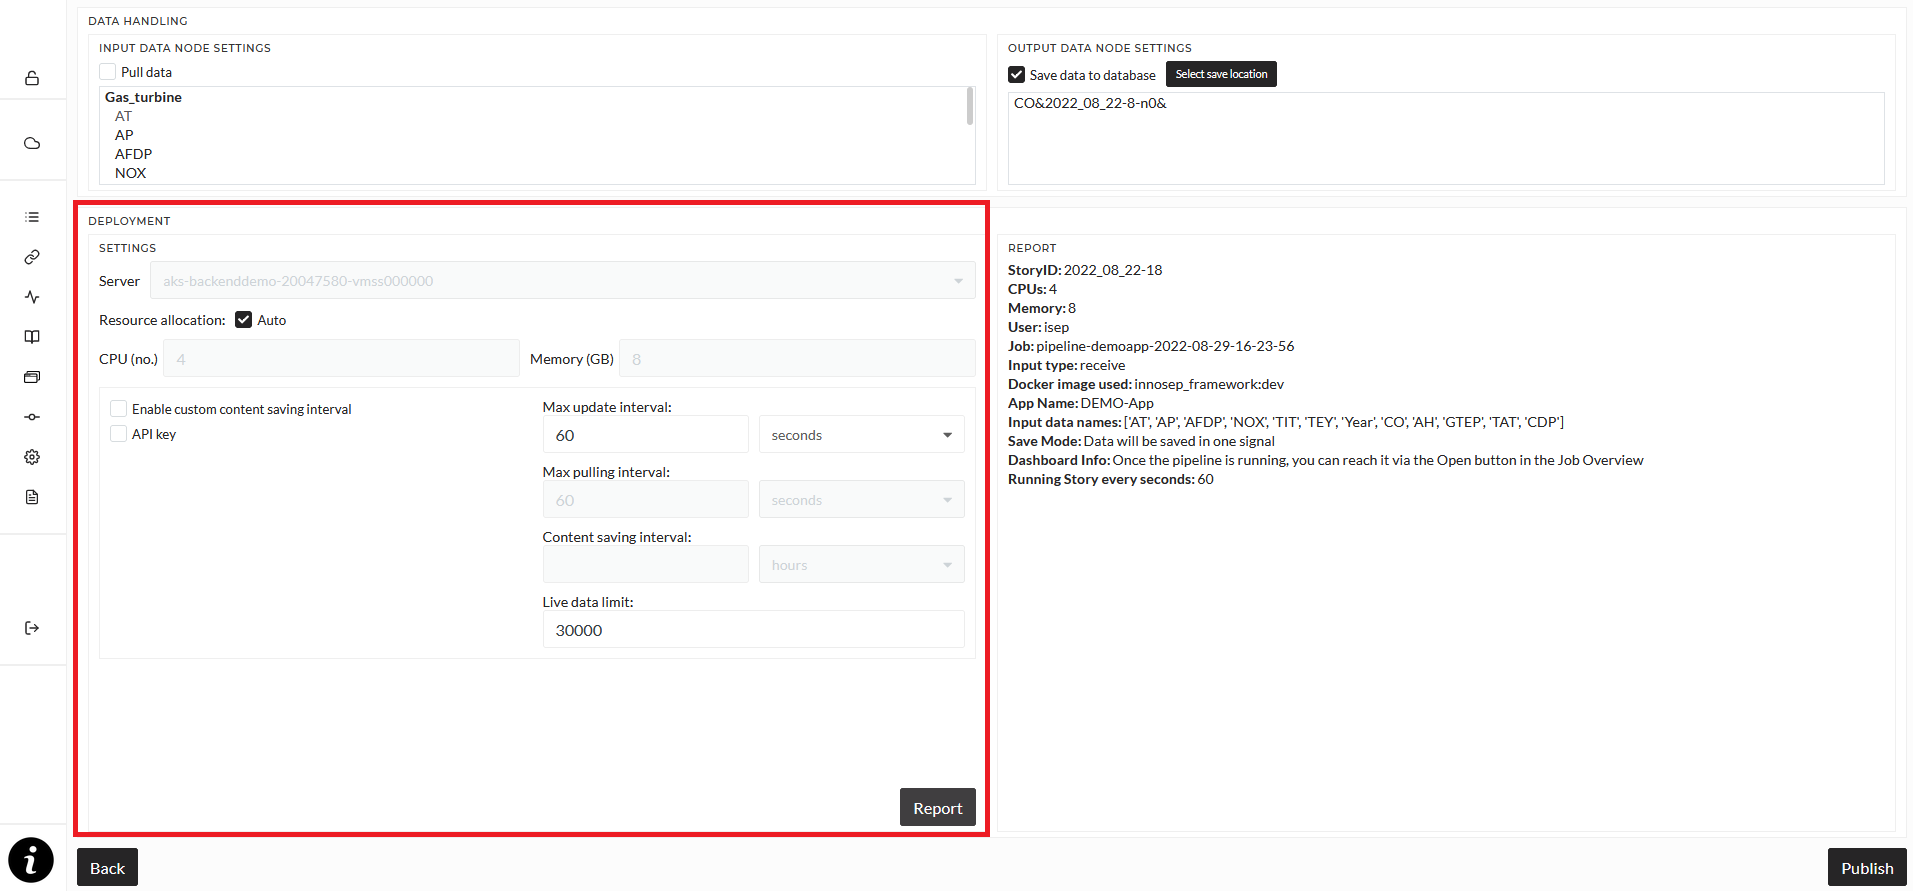
Once you are done with all your settings, click the "Report" button. In the Report section, basic information about the pipeline will be shown. Click the "Publish" button to start the pipeline.
REST mode
If you start a pipeline is REST mode, the pipeline will wait for you to send data via an HTTP request to it. The URL to send data to will be displayed after clicking the "Report" button, see the explaination above.
This is an example script in Python how to send random data to a pipeline:
"""
1. To send data change the keys of test data dict according to dashboard input keys.
2. Change the sending data url according to publish dashboard url
3. This script send the data with different length and until 10 message
 with interval of 30s (Could change in any format)
"""
import random
import time
import requests

def test_data(length_of_data):
    testdata = {
        "signal_name_1": [random.uniform(18.4, 29.4) * 1.0 for i in range(length_of_data)],
        "signal_name_2": [random.uniform(97885, 100442) * 1.0 for j in range(length_of_data)],
    }
    return testdata

send_data = True
number_of_send_request = 1

while send_data:
    num_data_points = random.randint(10, 100)
    data_for_test = test_data(num_data_points)

    response = requests.post("http://running.pipeline.com:32100/post_data",
                             json={"data": data_for_test, "stream_key": "", "return_data": "False"})

    number_of_send_request += 1
    print("Number of sending request : ", number_of_send_request, ".....Number of data point :", num_data_points,
          "....Response status : ", response.text)

    if number_of_send_request == 10:
        break

    time.sleep(30)
This is an exmaple script how to retrieve data from a running pipeline:
import requests

response = requests.post("http://running.pipeline.com:32100/get_data", json={"name": "signal_name_1,signal_name_2", "stream_key": ""})
print(response.text)