Importing Data
This section will show how to import data and local files. However, if you want to connect to databases or set up streaming connections, see details here.
Uploading files through the data navigation page and right-click menu. The following animation shows how to access the importing process.
You can upload following file types:
- csv
- xlsx and xls
- tdms
- mdf4
- dat
- wav
If you follow these steps, the importing process starts with the following options:
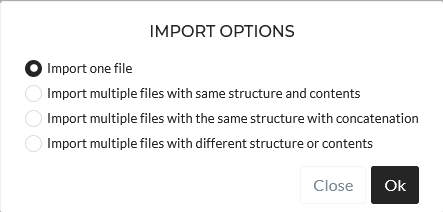
Here you can specify if you want to upload one or multiple files.
-
Import one file: Just one file can be uploaded through this option. You can configure once, and then the file will be inserted.
-
Import multiple files as the same structure and contents: Through this option, you can select up to 300 files simultaneously to upload. You configure it only once, and it will automatically adapt the configuration to every file. Each file will represent one folder. Important note: All file needs to have the same structure and column names. This option is helpful if you have multiple measurements and save each measurement per file.
-
Import multiple files with the same structure with concatenation: Through this option, you can select up to 300 files simultaneously to upload. You configure it only once, and it will automatically adapt the configuration to every file. All the files will be concatenated and will end up in one folder. This option is helpful if you have long time series saved in different files because of file restrictions. Important note: All file needs to have the same structure and column names.
-
Import multiple files with the same structure and contents: You can select up to 300 files simultaneously to upload. You have to configure them one by one. Each of the files saves in separate folders.
After a successful upload, the configuration panel will open. It will look like below:
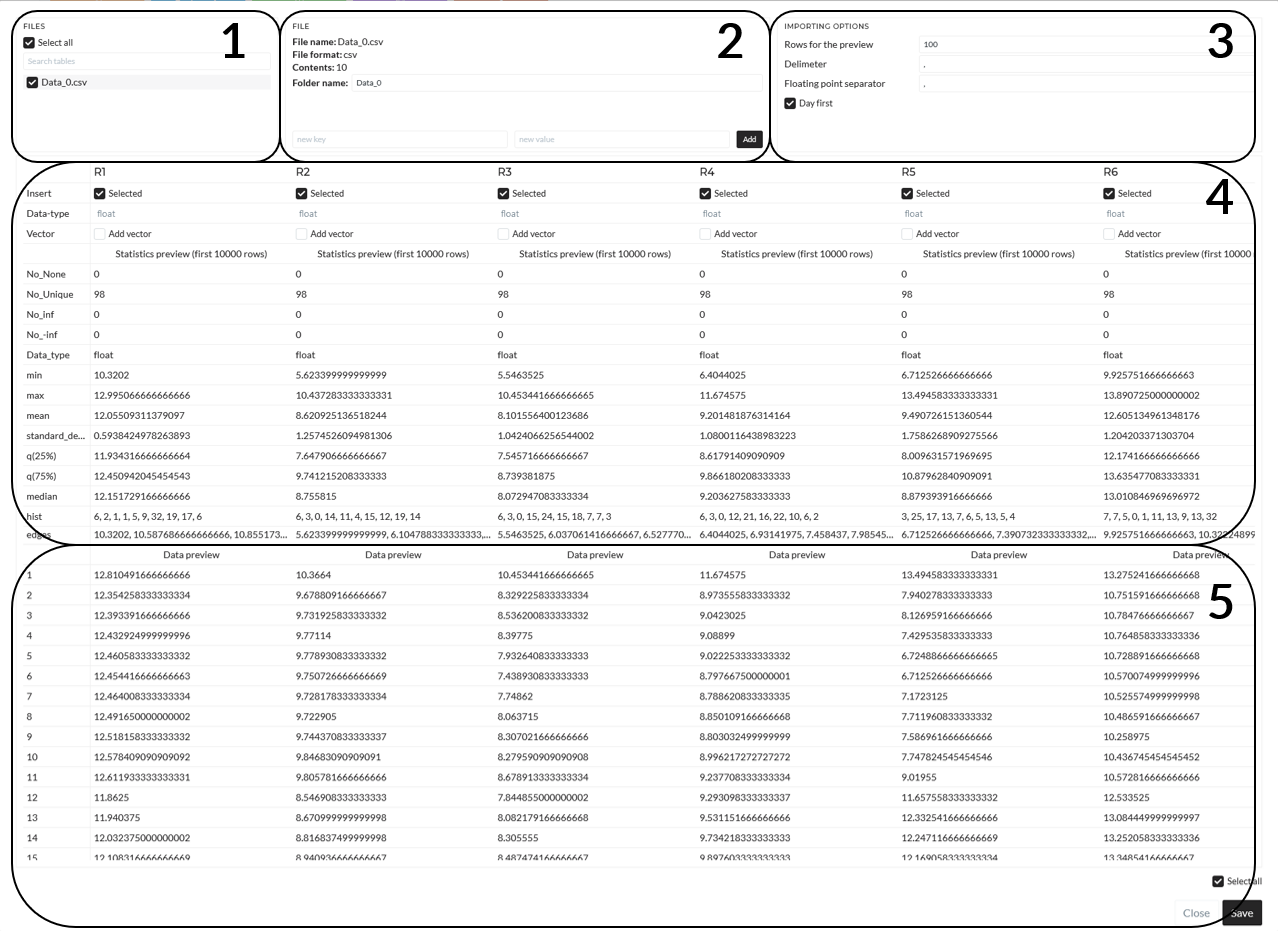
- In area 1, displays the file(s).
- In 2, it shows how many datasets are included in that file, and you can specify the folder name. Default is the filename as the folder name.
- In area 3, it is shown how many data points are currently in the preview and specifics about the file format. All of the delimiter, floating-point separator, and DateTime format options can be changed by you. If you change any option, the data reloads and data preview updates.
- In area 4, you can specify which dataset you want to upload with the checkboxes in “insert” – default is all. You can also set if the data has a vector or, in other words, if it is a time series and if you want to include the corresponding time axis as a vector. You also see the preview of the statistics of the data.
- In area 5, you see the preview of the data. After finding the proper setup, you can confirm and start inserting the data by clicking the save button.
Imported data to explore mode
Once you have imported the data maintaining the above instruction, you need to select at least one of them to go in explore mode. The following animation will show the full importing chain together for three sample folders from the project to explore mode:
The next animation will show the same importing but as Time-series data (value-vector pair). Where the vector will be considered as a time axis. You can see the difference also in the symbol of Time-series data and only value data:
Importing files via HTTP POST request
If you want to automatize importing files, you can use code to send HTTP requests to the backend directly to import files.
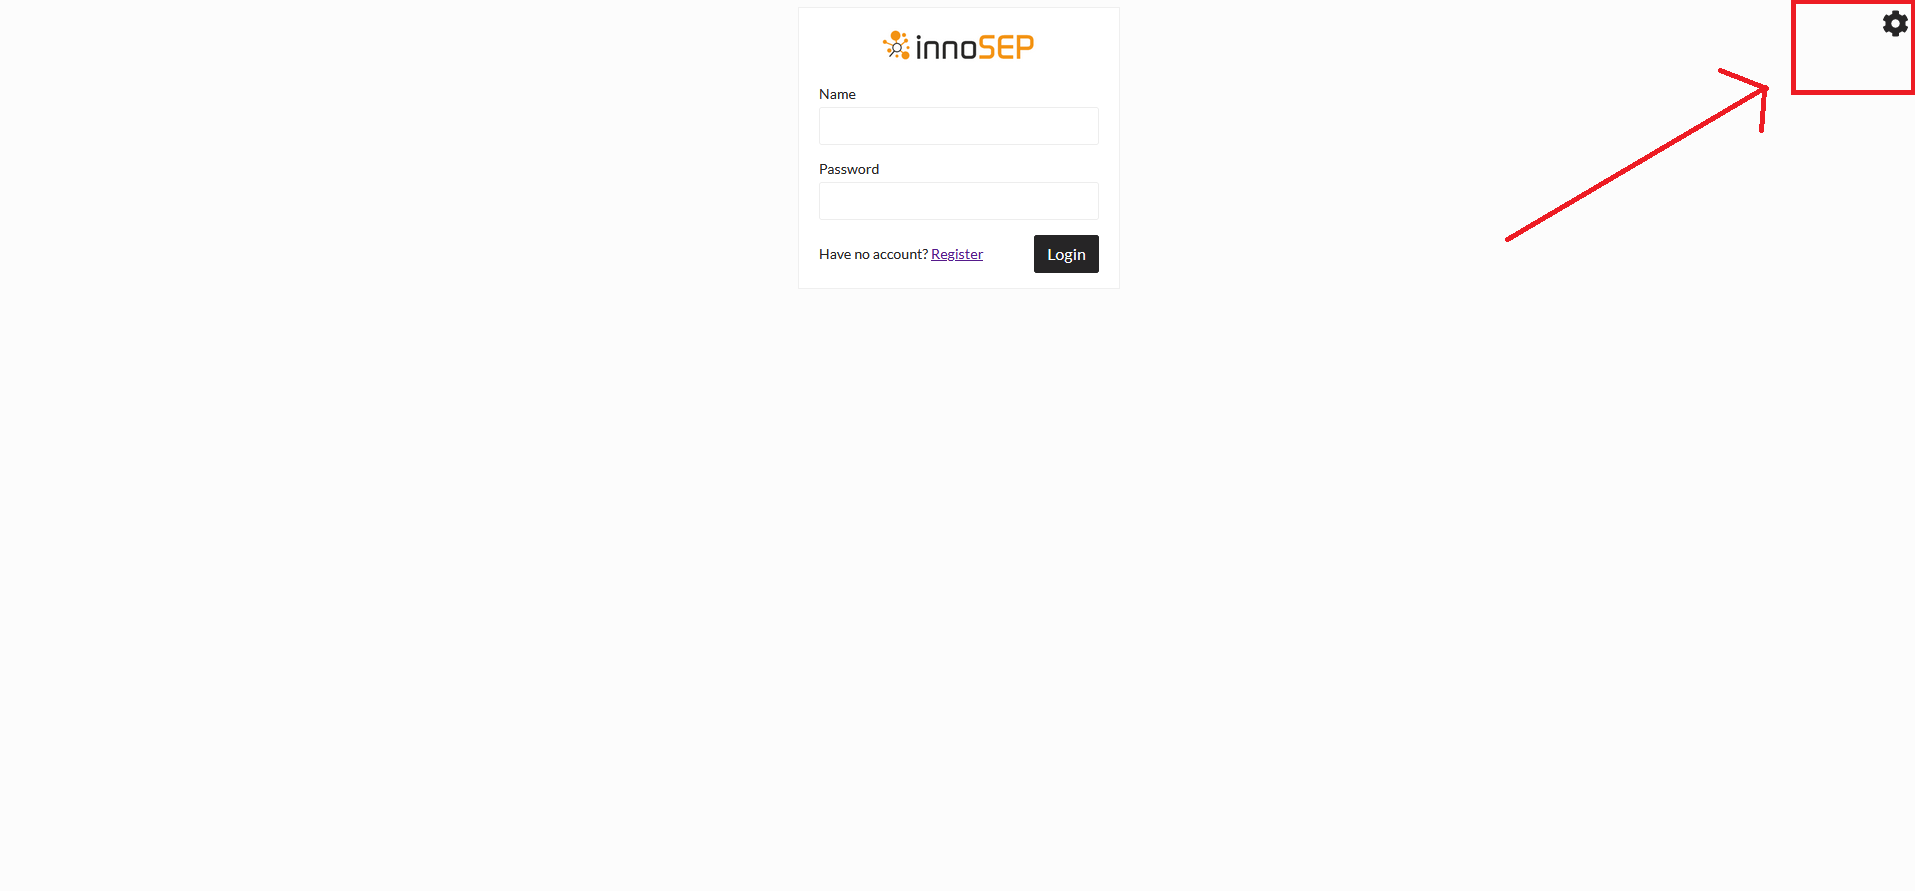
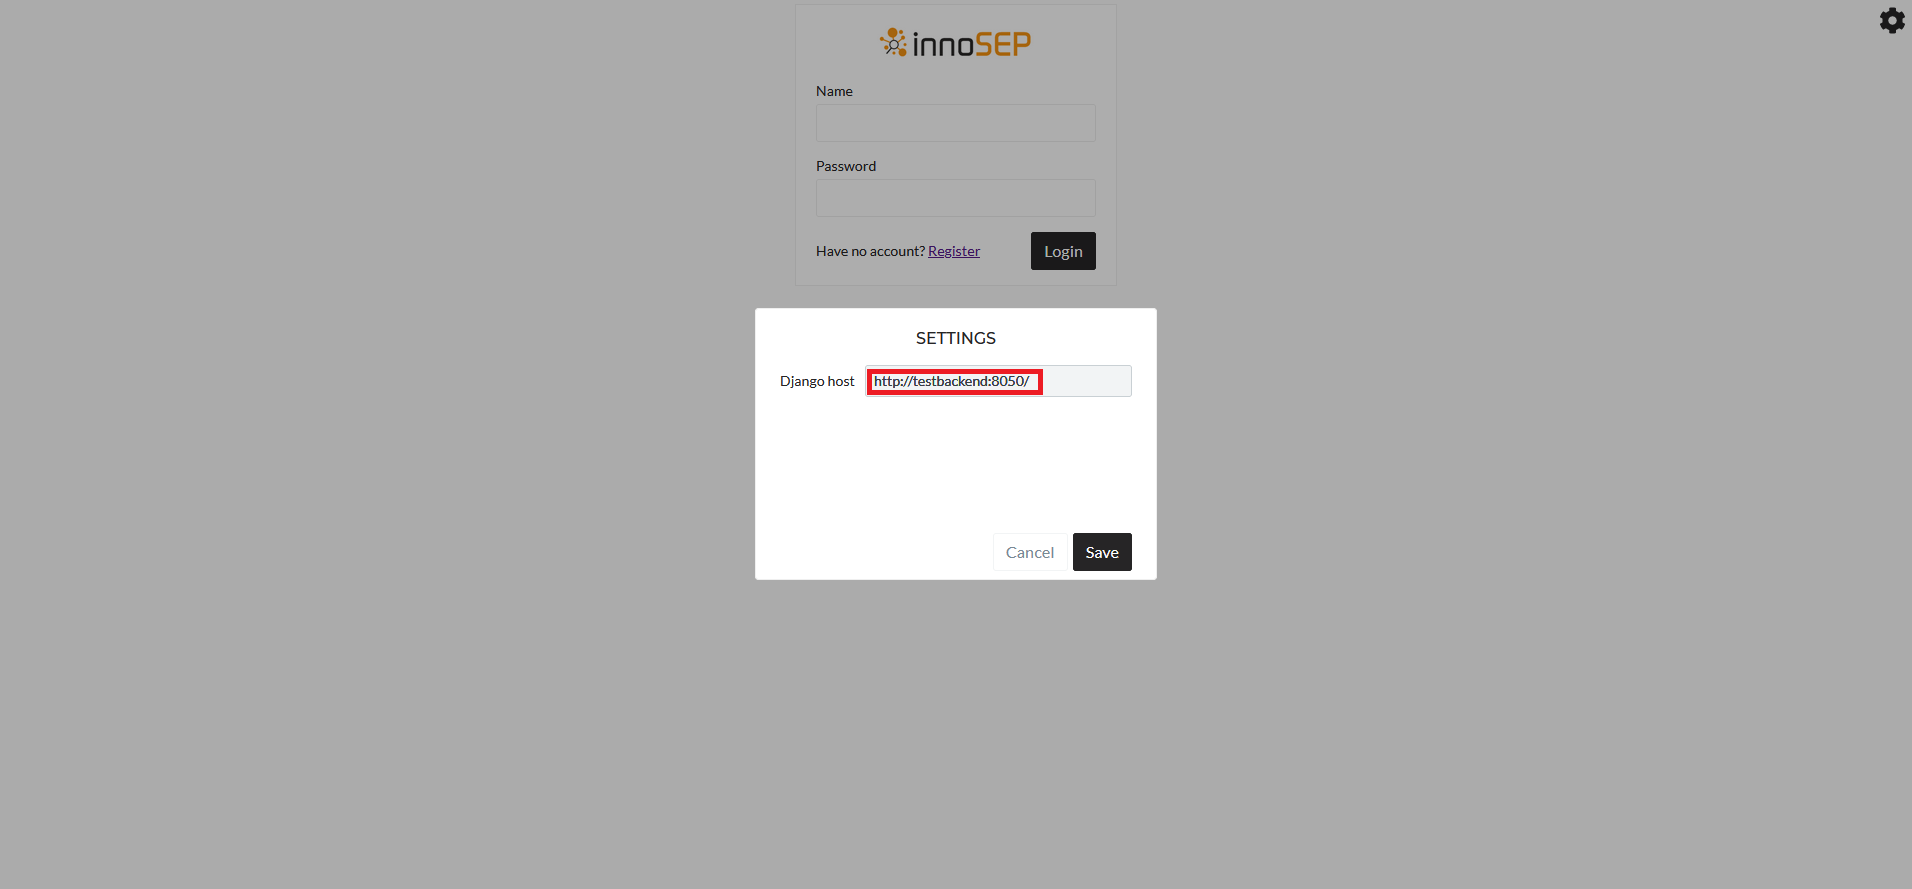
To import files directly via an HTTP request, you first need the URL of the backend. You can get this URL by going to the login page (you might have to logout for this) and clicking on the cog wheel at the top right
Then you need a Bearer token to login. You can use the following Python script as an example to get the token
import requests, json

data = {'username': '<username>', 'password': '<password>'}

response = requests.post('http://<backend_url_with_port>/token/', headers={'Content-Type': 'application/json'}, data=json.dumps(data)).json()

print(response)
Copy the content of the "access" key in the repsonse dict.
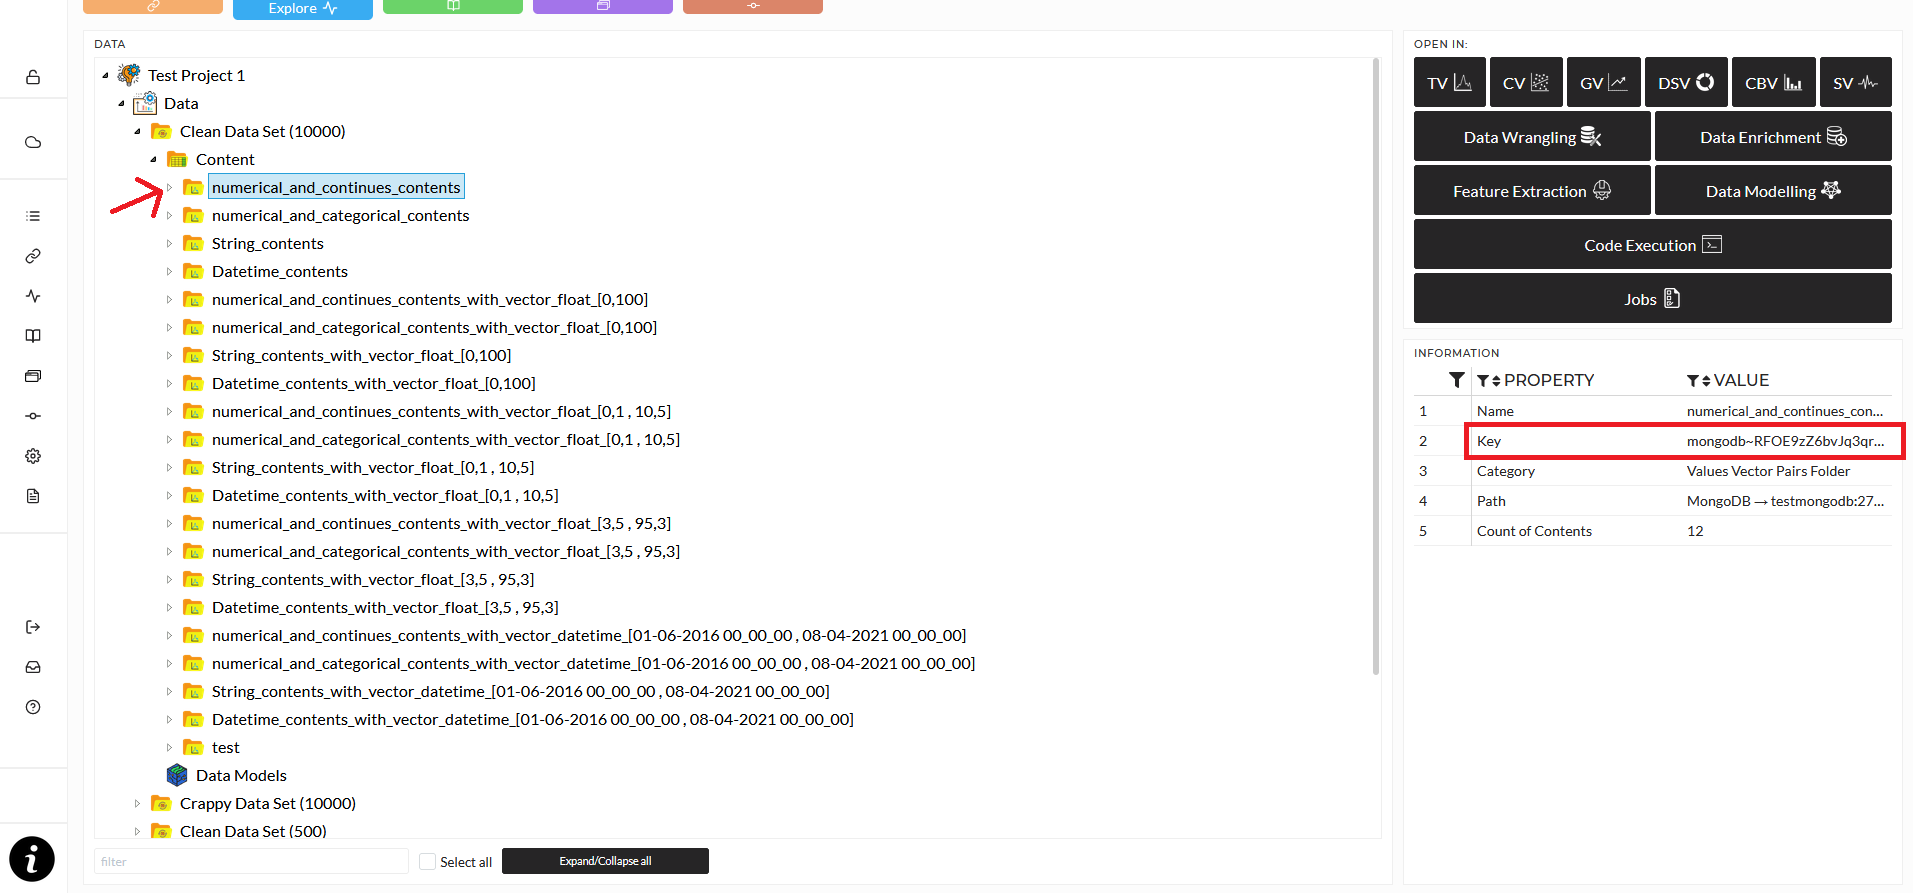
You also need a folder key, which you can get from the data explorer "Information" section. Select a folder, either Content oder data folder, and copy the entry for "Key" from the "Information" section.
Now you can import files directly via a script and an HTTP request. You will need to set the importing settings, specifically the delimiter and the floating point separator. You can import either to a new folder or into an existing folder. Here are two Python example scripts
import json, requests

data = {
    'import_option': 'multiple_files_with_different_structure',
    'import_to': 'new_folder',
    'delimiter': ';',
    'floating_point_separator': '.',
    'container_key': '<Content_folder_key>',
    "import_as": "new_folder"
}

multiple_files = [
    ('files', ('Dataset_2019-07-31.xlsx', open('/path/to/file1.csv', 'rb'))),
    ('files', ('Dataset_2019-07-31.xlsx', open('/path/to/file2.csv', 'rb')))
]

response = requests.post('http://<backend_url_with_port>/metadata/manual-create/', headers={'Authorization': 'Bearer <Bearer_token>'}, data=data, files=multiple_files).json()

print(response)
import json, requests

data = {
 'import_option': 'multiple_files_with_different_structure',
 'import_to': 'existing_folder',
 'delimiter': ';',
 'floating_point_separator': '.',
 'folder_key': '<existing_folder_key>',
 'import_as': "existing_folder"
}

multiple_files = [
    ('files', ('Dataset_2019-07-31.xlsx', open('/path/to/file1.csv', 'rb'))),
    ('files', ('Dataset_2019-07-31.xlsx', open('/path/to/file2.csv', 'rb')))
]

response = requests.post('http://<backend_url_with_port>/metadata/manual-create/', headers={'Authorization': 'Bearer <Bearer_token>'}, data=data, files=multiple_files).json()

print(response)
Importing data via HTTP POST request
In addition to importing files via HTTP POST request, it is also possible to directly send data to the backend and either create new signals in a folder or append to already existing signals.
First, you will again need the backend URL and the Bearer token. See in the above section how to get these.
Then you will need either the folder key, if you want to create new signals or the signal key. In the above section, you can see how to get a folder key. To get a signal key, simply select the signal in the tree view and copy the Key field from the Information panel.
With this information, you can send data directly to the /metadata/import/raw-data endpoint of the backend.
A couple of important points:
-
If you append data to an existing signal, the datatype has to be exactly the same as the already existing data. You can not append integers to floats, strings to int, and so on. There will be no conversion.
-
If you want to create a new signal, you have to also send a name for it. If the name already exists, data will not be appended, instead a new signal with the name_1 will be created.
Here is an example Python script that both appends and creates a new signal
import requests

url = "http://<backend_url_with_port>/metadata/import/raw-data"

post_data = [
   {
      "node_key": "<existing_folder_key>",
      "name": "raw",
      "values": [13,13,14],
      "vector": [1,2,3]
   },
   {
      "node_key": "<existing_signal_key>",
      "values": [13,13,15]
   }
]

token = "<Bearer_token>"
headers = {
   "Authorization": f"Bearer {token}",
   "Content-Type": "application/json"
}

response = requests.post(
   url=url,
   json=post_data,
   headers=headers
)

print(response.content)